
It is possible to visualise data from ClockWise on the online version of Power BI. This can be done using a data flow. In this manual, it will be explained how to configure one to get the correct data from ClockWise.
In order to work with Power BI, there needs to be an API-client. This can be made in Configuration → Settigns → OAuth/API clients. Click on "Add OAuth Client". Give a recognisable name to the client, which indicates what it is used for (e.g. Power BI), and fill in the email address of the connection administrator. Press Save.

Put the option "Access token expires" on "Never". The access token we will get in a later step will be used indefinitely.

Note: The authorisation code is only valid for an hour. Make sure the next step(s) are done within an hour, otherwise they need to be done again!
We need an autorisation code. For this, go to the OAuth client and click on "Request Authorization Code (api/v2/auth)".
A pop-up appears with a filled in "Response type", "Redirect URI" and "Clinet ID". Those shouldn't be changed. Click "Request".

You are redirected to the login page of ClockWise. Log in as usual.
After logging in, a new page is shown. On the page, you can see a code on the bottom.

This code is needed in the next step
We now need an access token. This works similarly as previous step, but now the button "Request Tokens" is needed.

The default settings are correct again, but there is one field that needs to be filled in: The autorisation code from last step.
Click on "Request"
A window opens with an access_token, refresh_token and some other information. The access_token is needed for the next steps.

This token is valid indefinitely, due to the "Access token expires" from the first step
The authorisation code is not needed anymore, so the time constraint of one hour doesn't apply anymore
Download the file ServerDataConnector.m from the site. Open it in a text editor.
In this file, and in this manual, the text "uwomgevingnaam", or "yourenvironmentname" is used. Replace those with the name of your ClockWise environment.
Furthermore, on line 3, there is the tekst **access token** between double quotes. Replace that (including the asterisks, excluding the quotes) with the access token from previous step.
If desired, you can give parameters to the different tables, comparable with the parameters of the ClockWise Data connector.
These can be configured in the Contents() function call on line 228. This function has a few parameters:
true or false, false by default)"), as URL-parameter (e.g. "all_projects=true&project_name_split=1,1"). Explanation of those fields can be found in the API documentation. For this, go to "yourenvironmentname.clockwise.info/api/v2/doc" → Reports → "Hours in flat format", where yourenvironmentname is the name of the ClockWise environment.Save the changes.
Now we can make the data flow
Log in the browser in the online environment of Power BI, and go to the workspace where the data flow will be made.
Note: This is not possible in a personal work space
A query is shown with a text like
let
  Source=""
in
  Source
Leave this, and click on Next.
The Power Query editor is now opened. Power BI really likes their query to yield a table, so you are sent to the text tools tab.
The editor that opens looks like the previous one, with a few extra lines.
With the right mouse button, click on query (in the left column), and make sure the checkbox at "Loading enabled" is unchecked! There are complicated types in the query, and Power BI can't use them at the moment.
We are now using this query to get the different tables from the data flow.
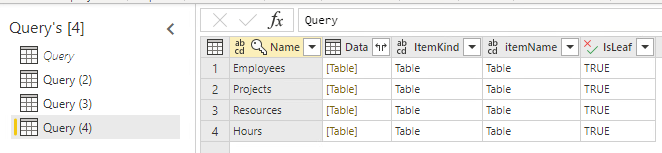
A query with the name "Query (...)" is made (with a number between the brackets)
Do these three steps another 3 times, for resp. "Projects", "Resource" and "Hours".
Note: Make sure each of those selections are made for the new "Query(...)", and not for the original "Query"! Othewise, the other queries can't retrieve their data, as the all refer to the original "Query".
Tip! It may be clearer when those queries are renamed to the table that is selected there. E.g. "Query (2)" could be renamed to "Employee". This is possible in the column at the right.
The data flow can now be saved. Validation can take a while, no worries when it takes 15 or so minutes.
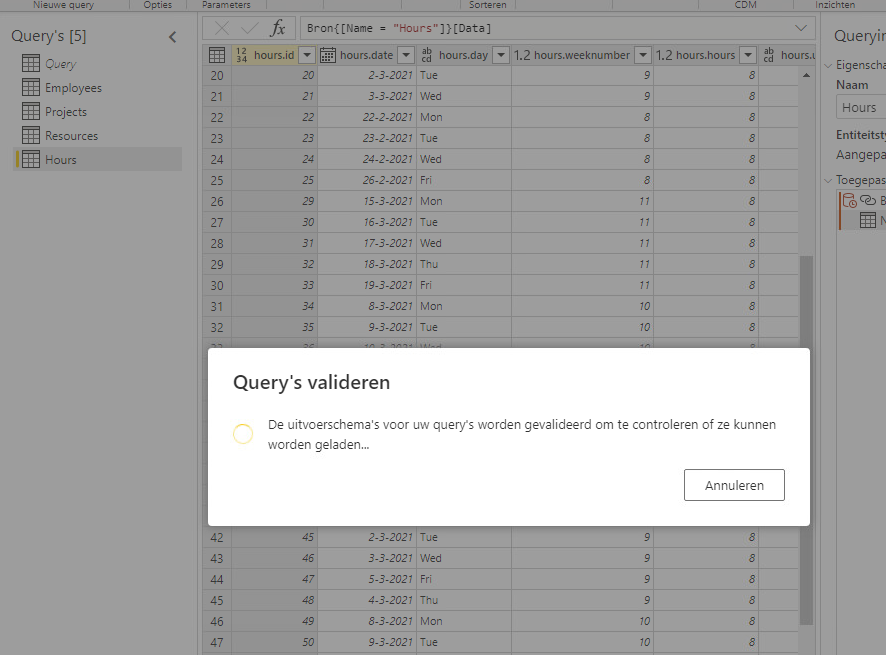
Sometimes, Power BI asks a couple of things during the validation process:
The four tables have references to each other, which allows them to be linked in the dataflow.
These resources are:
- hours.resource_id ↔ resources.resource_id
- resources.employee_id ↔ employees.employee_id
- resources.project_id ↔ projects.project_id
The following table gives an explanation of the most used fields in Power BI. Most of them will be self-explanatory.
As a general rule of thumb, the id fields are not necessary for graphing purposes. A few of those are needed to connect the four different tables to each other, but those relations should be there already (see the 'Link between the tables' section above).
| Power BI | <=> | ClockWise |
|---|---|---|
| employees.contract_hours_min | Minimum contract hours of the employee | |
| employees.department_name_path | Path of department names (by default separated by ' / ') | |
| employees.employee_email | Email address | |
| employees.employee_name | Name | |
| employees.salary_number | Salary number | |
| hourly_sales_rate | Hourly sales rate (available in all tables if 'retrieve rates' is set to true) | |
| hourly_purchase_rate | Hourly purchase rate (available in all tables if 'retrieve rates' is set to true) | |
| hours.date | Date | |
| hours.hours | Amount of hours | |
| hours.hourstatus | Hour status (written, submitted, approved or rejected) | |
| hours.units | Units associated with the hour entry | |
| projects.customer_name_path | Path of customer names (by default separated by ' / ') | |
| projects.end_date | Project deadline | |
| projects.hours_budgetted | Budgetted project hours | |
| projects.project_name_path | Path of project namen (by default separated by ' / ') | |
| projects.start_date | Start date of project | |
| resources.resource_status | Resource status (running, closed or in_preparation) | |
| employee_id | Employee identifier. Is used in the relation between the resource and employee tables | |
| project_id | Project identifier. Is used in the relation between the resource and project tables | |
| resource_id | Resource identifier. Is used in the relation between the hours and resource tables |
There are other similar fields to the ones listed above, for instance project_code_path, yielding a path of project codes instead of project names. These are not listed to keep the table short.
Keep in mind that (in the last example) the similar named project_id_path is probably not the field to use, unless a connection with another table (with project entries) is needed.
It is also possible to get different tables or endpoints in a dataflow, similarly to the GetTable function in the advanced section of the ClockWise Data connector manual. This is done with the ParsedTable(url) function.
There are two ways to do this:
Bron = Contents() on line 228, the line should be replaced with Bron = ParsedTabe(url) (with url being a double quoted string, containing the url of the endpoint. For instance Bron = ParsedTable("/report/flat/planning?params=here").GetTable function. Aforementioned example is already filled in there.It is possible that Power Bi shows warnings about some columns not having a type. This can be solved in the tab "Transform"
Note: The data flow cannot be saved while there are errors about columns without types!
This case we show how the Contents function would need to be called. For this, we use an example that we are going to make statistics on sub project level.
The following structure is used as clarification:

We want to use the summed hours in "Documentation", "Technic" and "Website" versus the data on those projects.
In order for those data to be retrieved, we need to give the following parameters to Power BI:
start=2020-01-01.allprojects=true&project_name_split=1,1&project_id_split=1,1Line 228 would then look like this:
Bron = Contents(false, "start=2020-01-01", "", "allprojects=true&project_name_split=1,1&project_id_split=1,1", "")
To save data from the API, it is possble to refresh the data incrementally
Note: This functionality is only available in Premium workspaces
Microsoft wrote documentation about this: Using incremental refresh with dataflows
Contents function work?The first parameter is either true or false, and indicates whether rate information should be retrieved as well.
The rest are in url-parameter format: They are notated as key=value, where key is one of the values in the API-documentation (which you can find on youraccountnaam.clockwise.info/api/v2/doc → Reports → "Hours in flat format"), and value the corresponding value.
Different key-value pairs are joined together with &. Also look at the example in the case above.
The fields parameter (which is used to retrieve specifiv fields): These are comma separated. (E.g. fields=name,code,type). To turn fields off, you can prepend an exclamation mark (E.g. fields=name,code,!type). There are also a few field groups, which can be used. These can be turned on and off on the same way (E.g. fields=name,projectfields,!otherfields,!type).
A few of the fields are already retrieved by default! It can be useful to first look which fields are retrieved, and then modify the parameters of the Contents function to turn fields on and off, as needed.
The script that is used here also works on Power BI Desktop, but there is an easier and little safer way to retrieve data, using the ClockWise Data connector
Information and instructions about the data connector can be found on the Data connector manual


